
Bugün tırnaklarımı iki renkli, çapraz ve noktalı bir desenle
süsledim. Ve bu defa dizayn bana ait diyebilirim =) Yani internette gördüğüm çapraz
desenlerden esinlendim evet ama notkaları ben ekledim. Başka bir yerde görmedim
ben bu deseni daha önce. Hadi size yapılışını göstereyim.
 |
| Çapraz noktalı tırnak süslemesi |
- İyice kuruduktan sonra, bantları kesip çaprazlamasına gelecek şekilde tırnaklarıma yapıştırdım.
- Bantın dışında kalan kısımları mercan rengi ojemle boyadım.
- Bantları çıkardım. (Dilerseniz noktalama yapmadan, topcoat sürerek bu şekilde de kullanabilirsiniz ojenizi.)
- Yeşil kısımlara çizgiye paralel olacak şekilde minik mercan noktalar koydum.
- Mercan rengi taraf da kuruduktan sonra o kısımlara da yeşilimden minik noktalar uyguladım.
Bugün üç kişiden iltifat aldım tırnaklarımla ilgili.
Denemenizi tavsiye ediyorum. Renkleri dilediğiniz gibi değiştirebilirsiniz. Hem
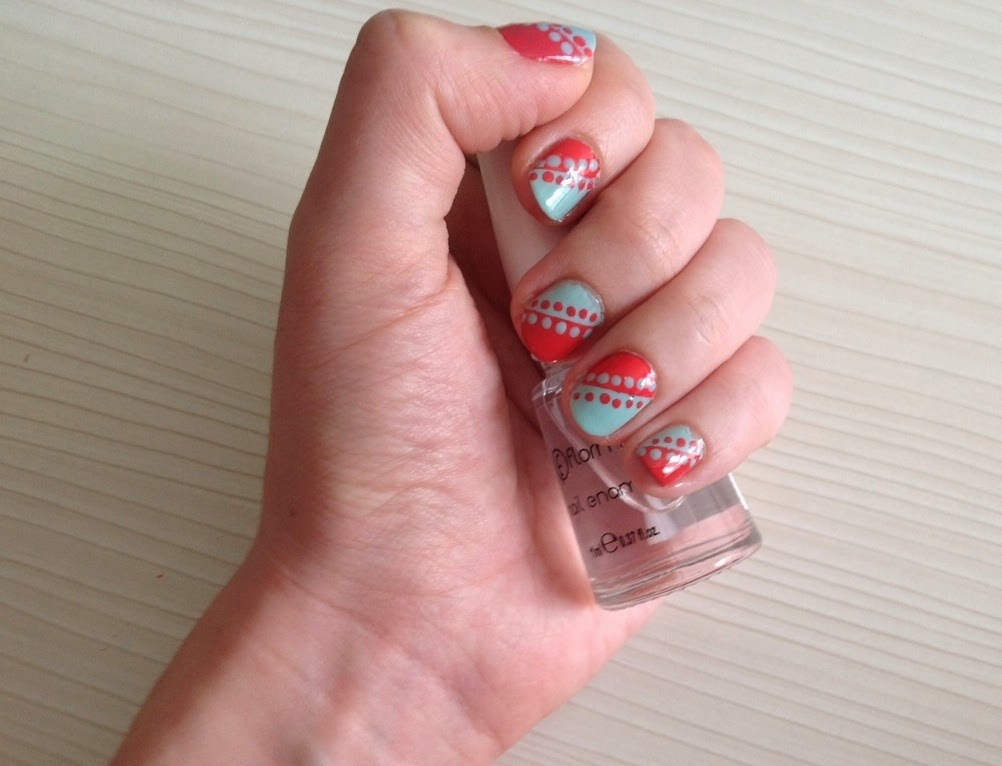
kolay hem de değişik olduğunu düşünüyorum. Son hali elimde böyle görünüyor:
Bu arada bu dizaynla ilgili işinize yarayacağını düşündüğüm
birkaç ipucu var:
·
Bant işlemine geçmeden önce en az yarım saat
beklemenizi tavsiye ederim. O sırada kitap okuyabilirsiniz, internette
takılabilirsiniz, televizyon izleyebilirsiniz. Yeter ki iyice kurusun.
·
Bantı tırnağa yapıştırmadan önce avucunuzun
içine bir kere yapıştırıp çekerseniz ojeye çok tutunmayacaktır. Özellikle
bantınız güçlüyse yapmanızı tavsiye ederim.
·
Bantları ikinci kat ojeyi sürdükten hemen sonra
çıkarmak gerekiyor. Kuruduktan sonra çıkarmaya çalışınca şekli bozulabiliyor.
·
Eğer ojenin bazı kısımlarında bozulmalar olursa,
tüm ojeyi çıkarmanız gerekmiyor. Aynı renk ojeyi bozulan bölgenin üstüne uygulayarak
tamir edebilirsiniz. En üstüne topcoat sürünce onlar anlaşılmıyor.
Sıra sizde =)
Sevgiler,
Alice
Hello everyone,
Today I painted my nails with a two-colored, diagonal and dotted design. This time I can say that the design belongs to me because even though I was inspired by some diagonal designs I saw on the internet, I’ve never seen the same diagonal dotted design before. Let me show you how to create it.
Today I painted my nails with a two-colored, diagonal and dotted design. This time I can say that the design belongs to me because even though I was inspired by some diagonal designs I saw on the internet, I’ve never seen the same diagonal dotted design before. Let me show you how to create it.
 |
| Diagonal dotted nail art steps |
- First, I’ve painted my nails with two thin
coats of a tealish polish.
- After it’s completely dried, I’ve cut and stuck tape diagonally on my
nails.
- I painted my nails with a coralish polish over
the tape.
- I took off the tape. (If you wish you can apply
topcoat and use your nail design just as it is.)
- I put small coral dots over the teal color. The
dots are parallel to the diagonal lines.
- In the same way, after the coral polish has also
dried, I applied small teal dots on the other side.
Today
I received complimets from three different people. So, I totally advice you to
give it a try. You can play with the colors as you wish. I think it is both easy
and different. My finished look is like this:

By
the way, here are some tips that might help you with this design:
- Before the tape phase, it is better to wait for
at least half an hour. You can read books, surf the internet, or watch TV.
Just let it dry completely.
- If you stick the tape to your palm before using
it on your nail, it will be less sticky, which is better especially if
your tape is strong.
- You need to take off the tape just after you
apply the second color. If you take it after the polish dries, you might
not have a good shape.
- If there are any imperfections on any part of
your polish, you can fix it by using the same color on it. You don’t have
to take off your polish and wait another 30 minutes because when you apply
top coat, it smoothes out everything.
It’s
your turn now =)
Love,
Alice
Hiç yorum yok:
Yorum Gönder